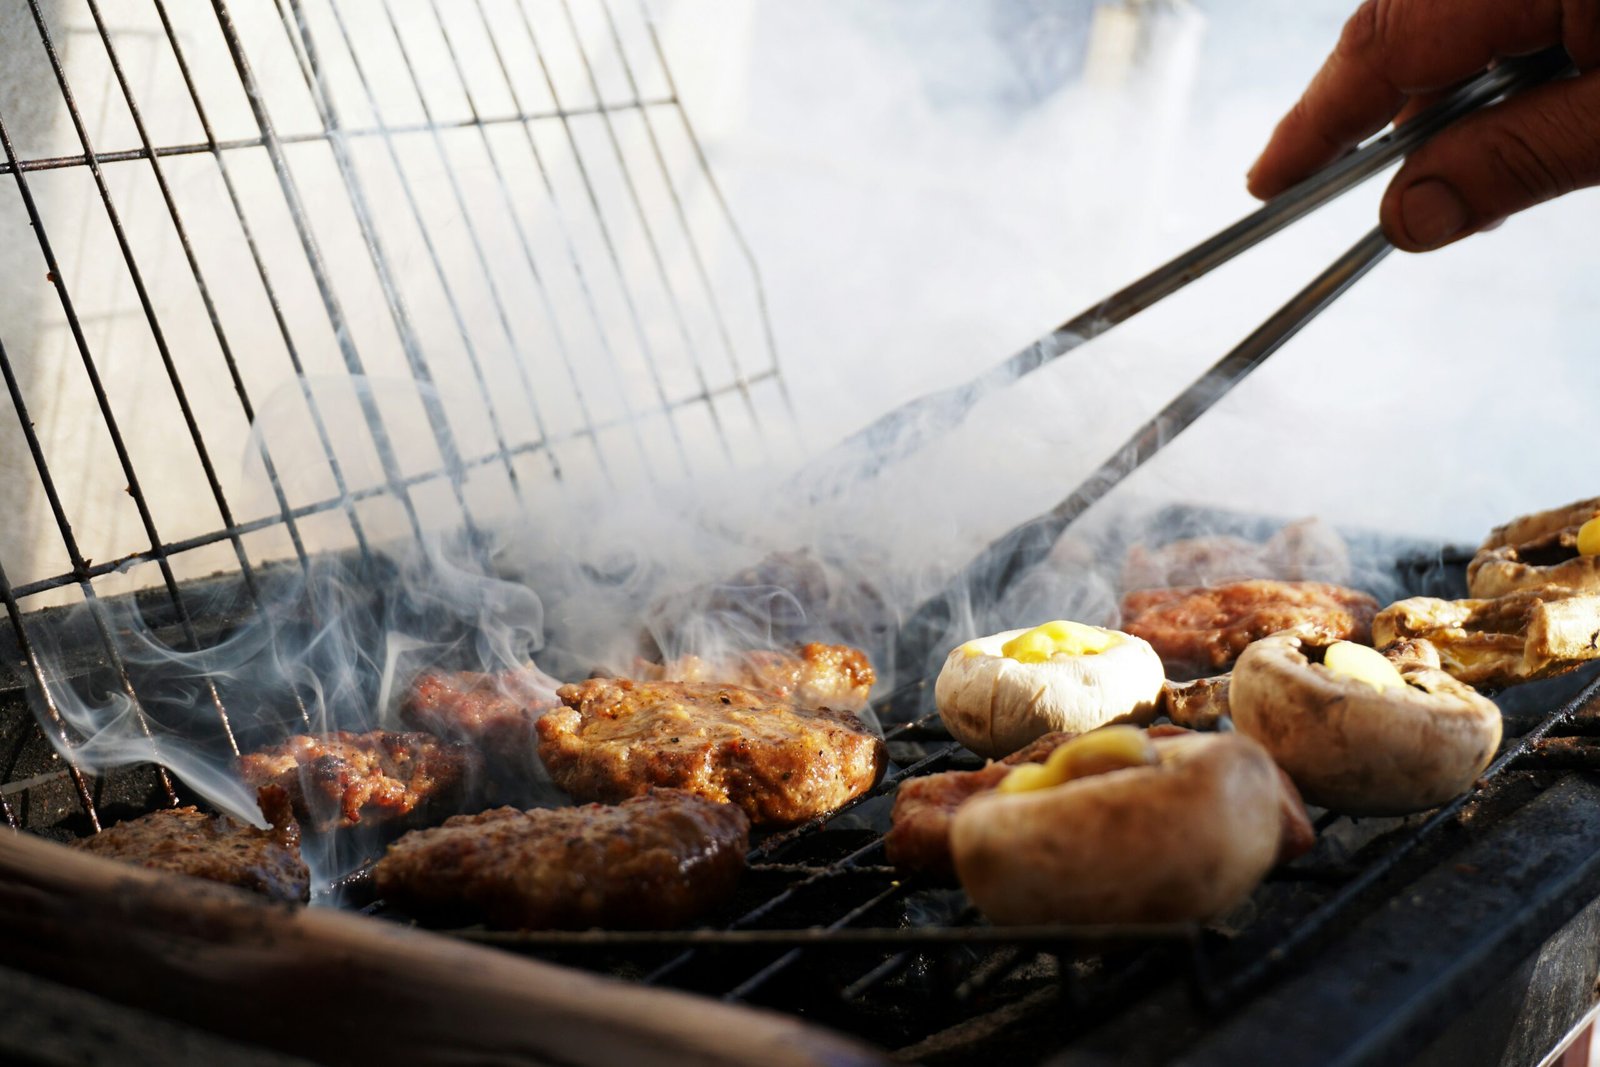
You may have heard the term “direct grilling” before, but do you know what it actually means? Direct grilling refers to the process of cooking food directly over an open flame or hot coals. It is a popular cooking technique that allows for quick and intense heat, resulting in beautifully seared and flavorful dishes. From sizzling steaks to juicy burgers, direct grilling is a versatile method that brings out the best in your favorite meats and vegetables. So, whether you’re a seasoned grill master or a novice cook, learning the ins and outs of direct grilling will undoubtedly enhance your culinary skills and take your backyard barbecues to the next level. Direct grilling is a popular cooking technique that involves cooking food directly over the heat source, such as charcoal or gas burners. It is a straightforward and efficient way to cook food, as the heat is directly applied to the food. This method is perfect for achieving quick and even cooking, creating flavorful grilled dishes with a nice charred exterior. Whether you’re grilling steaks, vegetables, or seafood, understanding the basics of direct grilling is essential for a successful grilling experience.
Definition of direct grilling
Direct grilling refers to the process of cooking food directly over the heat source, with the food coming into direct contact with the flames or heat elements. The food is placed on the grill grates, allowing it to cook quickly and develop a delicious sear. Direct grilling is ideal for foods that require shorter cooking times and those that benefit from a direct, high heat. It is the opposite of indirect grilling, where the heat is distributed around the food, allowing for slower and more gentle cooking.
Difference between direct and indirect grilling
The main difference between direct and indirect grilling lies in the heat distribution and cooking method. Direct grilling involves placing the food directly above the heat source, while indirect grilling involves situating the food away from the heat source, allowing for a more gentle and slower cooking process. Direct grilling is best for foods that cook quickly at higher temperatures, such as steaks, burgers, and vegetables. On the other hand, indirect grilling is ideal for foods that require longer cooking times, like roasts or whole chickens. Understanding the distinction between the two methods will help you determine the best approach for different types of food.
Understanding the heat source in direct grilling
The heat source is a crucial element in direct grilling. There are various options available, such as charcoal grills, gas grills, or even electric grills. Charcoal grills are a favorite among grilling enthusiasts due to the unique smoky flavor they impart on the food. Lighting the charcoal and controlling the heat can require some practice, but with experience, you’ll become a pro. Gas grills provide a convenient and consistent heat source, with the ability to control the temperature more easily. Electric grills are a great option for those with limited outdoor space or who prefer a more controlled heat source. Whichever grill you choose, it’s important to understand the specific heat settings and how they affect the cooking process.
Types of grills suitable for direct grilling
When it comes to direct grilling, there are different types of grills to choose from based on personal preference and budget. The most common types of grills used for direct grilling are charcoal grills, gas grills, and electric grills.
Charcoal grills are traditional and loved by many for their ability to provide a smoky flavor to the food. They require charcoal briquettes or lump charcoal as the heat source and can reach high temperatures quickly. Gas grills, on the other hand, are convenient and easy to use. They utilize propane or natural gas as the fuel source and offer precise heat control. Electric grills are a good option for those with limited outdoor space as they can be used both indoors and outdoors. These grills require electricity to power the heat elements and offer consistent heat distribution.
Ultimately, the choice of grill depends on your personal preference, available space, and cooking needs.
Essential tools for direct grilling
To ensure a successful direct grilling experience, there are a few essential tools that you’ll need. These tools will not only make your grilling process more efficient but also contribute to the overall safety of the cooking process.
Grill tongs: Long tongs are a must-have tool for direct grilling. They allow you to flip and move the food on the grill without risking burns.
Grill spatula: A wide, sturdy spatula is essential for flipping delicate foods like fish or burgers without them falling apart.
Grill brush: Keeping your grill grates clean is crucial for preventing food from sticking and ensuring optimal cooking results. A grill brush with sturdy bristles will help you remove any residue from previous grilling sessions.
Meat thermometer: To ensure food safety and perfect doneness, a reliable meat thermometer is essential. It allows you to accurately measure the internal temperature of the food.
Grilling gloves: Protecting your hands from the heat is essential, especially when handling hot grill grates or charcoal. Heat-resistant grilling gloves are designed to provide the necessary protection while allowing for dexterity.
Basting brush: Whether you’re using marinades or glazes, a basting brush is handy for adding flavor to your grilled creations.
Safety equipment for direct grilling
Safety should always be a priority when it comes to outdoor cooking. There are a few safety equipment items that you should have on hand when direct grilling.
Fire extinguisher: It’s always a good idea to have a fire extinguisher nearby in case of any unexpected flare-ups or accidents. Make sure it is easily accessible and suitable for use on grease fires.
Grill mitts: In addition to grilling gloves, having a pair of mitts is beneficial for protecting your arms and forearms when reaching over hot grills.
Apron: Wearing an apron can help protect your clothing from any spills, splatters, or grease spatters that may occur during the grilling process.
Long-handled tools: Using long-handled tools, such as tongs and spatulas, will prevent you from getting too close to the heat source and minimize the risk of burns.
By having these essential tools and safety equipment on hand, you can enjoy a safe and enjoyable grilling experience.
Correct placement of coals or heat source
When it comes to direct grilling on a charcoal grill, the correct placement of coals is crucial for achieving the desired heat and cooking results. Here are a few tips to ensure proper coal placement:
Two-zone fire: For versatility and control, creating a two-zone fire is recommended. This involves placing coals on one side of the grill, creating a hot zone and a cool zone. This arrangement allows you to sear the food over direct heat and then transfer it to the cooler side for more gentle cooking.
Even distribution: When placing the coals, ensure they are evenly distributed to maintain consistent heat across the grill. This will help prevent hot spots and ensure even cooking.
Varying coal amounts: Depending on the type of food you’re grilling, you may need to adjust the amount of coals used. Thicker cuts of meat may require more coals for a longer cooking time, while thinner cuts may require fewer coals.
For gas grills, the heat source is already built into the grill. It’s essential to preheat the grill according to the manufacturer’s instructions to ensure proper cooking temperatures.
Preheating the grill
Preheating the grill is an essential step to ensure even cooking and prevent food from sticking to the grill grates. Proper preheating allows the grates to heat up, reducing the risk of food sticking and promoting the development of those coveted grill marks.
For charcoal grills, preheating involves lighting the coals and allowing them to burn until they are covered with a layer of white ash. This process usually takes about 20-30 minutes, depending on the type of charcoal used. It’s important to ensure the grill lid is closed during preheating to allow the heat to build up inside the grill.
For gas grills, preheating typically involves turning on the burners to the desired temperature and allowing the grill to heat up for about 10-15 minutes with the lid closed. This allows the grates to reach the desired temperature, ensuring proper searing and heat distribution.
Regardless of your grill type, be sure to preheat the grill before placing any food on the grates. This will help you achieve optimal cooking results and ensure that your food is safe to eat.
Grill cleaning and preparation
Before every grilling session, it’s essential to clean and prepare your grill to ensure optimal cooking conditions and prevent any residue from contaminating your food. Here are the steps to follow for grill cleaning and preparation:
Scrape the grates: Use a grill brush to scrape off any leftover residue from previous grilling sessions. This will help prevent food from sticking and create a clean cooking surface.
Remove and clean the ash catcher: If you’re using a charcoal grill, remove and empty the ash catcher. Dispose of the ash properly and clean the catcher if necessary to ensure proper airflow during grilling.
Check for any obstructions: Before igniting the grill, check for any obstructions in the burner tubes or ignition ports of gas grills. Clear away any debris or spider webs that may interfere with the gas flow.
Wipe down the exterior: Give the exterior of your grill a quick wipe down to remove any dust or dirt buildup. This will not only keep your grill looking clean but also prevent any potential contamination while grilling.
By following these simple cleaning and preparation steps, you’ll ensure a clean and safe grilling environment, allowing you to focus on cooking delicious food.
Meat options for direct grilling
Direct grilling is particularly well-suited for cooking different types of meat. The high, direct heat allows for quick searing, creating a delicious crust while keeping the interior juicy and flavorful. Here are some popular meat options for direct grilling:
Steaks: Thick cuts of steak, such as ribeye, New York strip, or filet mignon, are perfect for direct grilling. Aim for a high heat to achieve a nice sear on the outside while maintaining a juicy interior.
Burgers: Whether you’re grilling beef, turkey, or veggie burgers, direct grilling is the way to go. Place the patties directly over the heat source and flip them once to ensure even cooking.
Pork chops: Thick-cut pork chops are ideal for direct grilling. Season them to your liking and grill them over high heat until cooked through, with a slight char on the outside.
Chicken breasts: Skinless chicken breasts can be grilled directly, but it’s important to monitor the cooking time to avoid drying them out. Pound them to an even thickness, season, and grill until the internal temperature reaches 165°F (74°C).
Lamb chops: Tender and flavorful lamb chops are perfect for direct grilling. Season them with herbs and spices and grill over high heat for a delicious result.
When grilling meat, it’s important to remember that different cuts and thicknesses will require varying cooking times. Using a meat thermometer will ensure that you achieve the desired doneness without overcooking.
Vegetable options for direct grilling
Direct grilling is not limited to meat alone – it’s also a fantastic way to enhance the flavors of vegetables and bring a delicious smoky char to your dishes. Here are some vegetable options that are perfect for direct grilling:
Bell peppers: Grill whole bell peppers directly over the heat until the skin blackens. Once cooled, peel off the charred skin and slice or chop the peppers for a flavorful addition to salads, sandwiches, or salsas.
Zucchini and summer squash: Slice the zucchini or summer squash lengthwise into planks, brush with olive oil, and season with salt and pepper. Grill over direct heat until tender and slightly charred.
Corn on the cob: Remove the husks and silk from the corn. Brush the corn with melted butter and seasonings, then grill directly until kernels are tender and lightly charred.
Portobello mushrooms: Remove the stems and coat the mushrooms with olive oil, minced garlic, and fresh herbs. Grill them directly over high heat until the mushrooms are tender.
Asparagus: Toss asparagus spears with olive oil, salt, and pepper, then grill directly until they are slightly charred and tender.
Direct grilling vegetables adds a delightful smoky flavor to their natural sweetness while retaining their vibrant colors and crispness. Don’t shy away from experimenting with different vegetables to discover your favorites.
Seafood options for direct grilling
Grilling seafood directly over the heat imparts a unique smoky flavor while ensuring a moist and tender result. Here are some popular seafood options that are perfect for direct grilling:
Shrimp: Thread shrimp onto skewers or use a grill basket to prevent them from falling through the grates. Grill them directly until they turn pink and opaque.
Salmon fillets: Place salmon fillets skin-side down directly on the grill grates. Grill them until the flesh is opaque and flakes easily with a fork.
Tuna steaks: Brush tuna steaks with olive oil and season with salt and pepper. Grill them directly for a short amount of time to achieve a medium-rare or medium doneness.
Scallops: Pat dry and season scallops with salt and pepper. Grill them directly until they are opaque and slightly firm to the touch.
Grilling seafood requires delicate timing to prevent overcooking. Depending on the thickness of the seafood, it’s important to keep a close eye on the cooking process to achieve optimal results.
Fruits that can be directly grilled
Grilling fruits adds a delightful smoky sweetness to their natural flavors, making them a perfect addition to both sweet and savory dishes. Here are some fruits that can be directly grilled:
Pineapple: Cut the pineapple into slices or spears and grill them directly until they develop grill marks and caramelize slightly.
Peaches: Cut the peaches in half and remove the pit. Grill the cut side directly until they soften and develop char marks.
Watermelon: Cut watermelon into thick slices and grill them directly for a short amount of time to enhance the natural sweetness.
Mangoes: Slice mangoes and remove the pits. Grill them directly until they are just tender and have grill marks.
Grilled fruits can be enjoyed as a simple dessert on their own, as a topping for ice cream or salads, or even as an accompaniment to grilled meats. Let your creativity guide you in incorporating grilled fruits into your meals.
Marination techniques
Marinating your ingredients before direct grilling can add depth of flavor and enhance the tenderness of the food. Here are some marination techniques to consider:
Wet marinades: Wet marinades consist of a liquid-based mixture that often includes acidic ingredients like vinegar, citrus juice, or yogurt. The food is soaked in the marinade for a specified period, allowing the flavors to infuse and tenderize the meat. Wet marinades are particularly useful for tougher cuts of meat.
Dry rubs: Dry rubs consist of a mixture of dry spices, herbs, and seasonings that are rubbed onto the surface of the food before grilling. The rub forms a flavorful crust and enhances the taste of the ingredients. Dry rubs are popular for pork ribs, brisket, or chicken wings.
Injection marinades: Injection marinades involve using a syringe or marinade injector to inject a flavorful liquid directly into the meat. This technique is commonly used for large cuts, like whole poultry or pork roasts, to ensure even distribution of flavor and moisture.
When marinating food, it’s important to follow the recommended marinating times, as over-marinating can lead to a mushy texture or overpowering flavors. Experiment with different marinades and techniques to find your favorite combinations.
Seasoning tips
In addition to marinating, proper seasoning plays a crucial role in enhancing the flavors of grilled food. Here are some seasoning tips to help you achieve delicious results:
Salt: Salt is a crucial seasoning for any grilled dish, as it enhances the natural flavors of the food. Season your ingredients with salt just before grilling.
Pepper: Freshly cracked black pepper adds a warm and slightly spicy flavor to grilled dishes. Use it to season meat, vegetables, or even fruits.
Herbs and spices: Experiment with different herbs and spices to add depth and complexity to your grilled dishes. Some popular options include garlic powder, paprika, cumin, rosemary, or thyme.
Citrus zest: The zest of lemons, limes, or oranges adds a refreshing burst of flavor to grilled dishes. Grate the zest and sprinkle it over the food before grilling.
Remember to season your food to taste and adjust the seasonings according to your preferences. It’s always possible to add more seasoning later if desired, but it’s more challenging to reduce the seasoning if you’ve added too much.
Cutting and skewering for even cooking
Properly cutting and skewering your ingredients is essential for even cooking and achieving consistent results. Here are some tips for cutting and skewering for direct grilling:
Meat: When grilling meat, ensure that the cuts are of even thickness for uniform cooking. If necessary, use a meat mallet to pound thicker cuts to an even thickness. This will prevent one side from overcooking while the other side remains undercooked.
Vegetables: Cut vegetables into uniform sizes to ensure even cooking. This allows them to cook at the same rate, preventing some pieces from becoming too charred or overly softened.
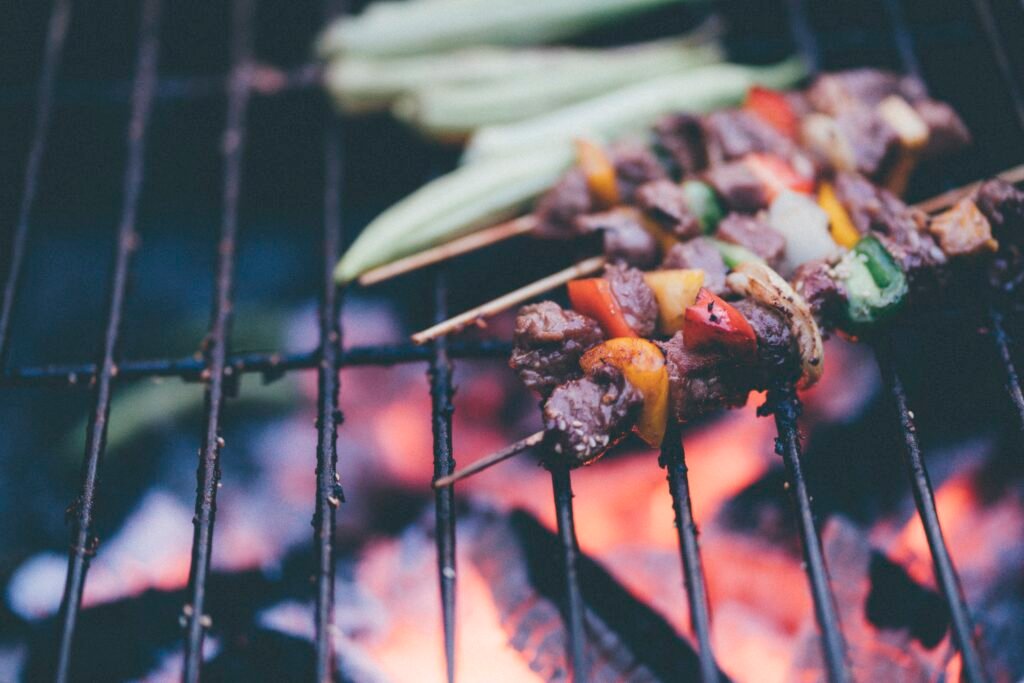
Skewering: If you’re using skewers, make sure to evenly distribute the ingredients on the skewer. This will ensure that everything cooks at the same rate. Leave a small gap between each piece to ensure proper heat circulation.
By following these cutting and skewering tips, you’ll achieve consistent cooking results, ensuring that your food is evenly cooked and bursting with flavors.
How to control grill temperature
Controlling the grill temperature is essential for achieving the desired cooking results. Here are some tips to help you maintain the right temperature during direct grilling:
Adjusting the vents: For charcoal grills, the vents on the bottom and top control oxygen flow and, subsequently, the heat. Opening the vents wider allows for more oxygen and a hotter fire, while closing them reduces the airflow and lowers the temperature. Experiment with the vent settings to find the right temperature for your grilling needs.
Gas grill temperature control: Gas grills usually have control knobs that allow you to adjust the level of heat. The specific temperature range will depend on your grill’s settings. It’s important to preheat the grill and adjust the temperature according to your recipe recommendations or personal preference.
Using a thermometer: To ensure accuracy, consider using a grill thermometer to monitor the temperature of the grill. Probe thermometers can be inserted into the food, allowing you to precisely monitor the internal temperature and prevent overcooking.
By paying close attention to the temperature and making adjustments as needed, you’ll achieve optimal cooking results and have better control over the doneness of your grilled food.
Checking and measuring grill temperature
Checking and measuring the grill temperature is essential for achieving consistent results and determining the doneness of the food. Here are some methods for checking and measuring grill temperature:
Grill lid thermometer: Many grills have built-in lid thermometers that provide a general indication of the internal temperature. However, it’s important to note that the readings may not always be accurate, as they typically measure the temperature near the top of the grill, which may differ from the cooking surface.
Grill grate thermometer: Using a grill grate thermometer allows you to measure the temperature directly where the food is placed. This can provide a more accurate reading of the cooking temperature, allowing you to adjust heat accordingly.
Instant-read thermometer: An instant-read thermometer is an essential tool for determining the internal temperature of meat and ensuring that it is cooked to the desired doneness. Insert the thermometer into the thickest part of the meat, away from any bones, for an accurate reading.
By utilizing these temperature measurement techniques, you’ll have better control over your grilling process and be able to achieve perfect doneness every time.
Adjusting heat during grilling
Sometimes, you may need to adjust the heat during the grilling process to achieve consistent cooking or prevent overcooking. Here are some tips for adjusting heat during grilling:
For charcoal grills: To increase the heat, simply add more charcoal or push the existing charcoal together. To lower the heat, spread out the charcoal to reduce the direct contact with the food. You can also partially close the vents to limit oxygen flow and reduce the intensity of the fire.
For gas grills: To increase the heat, simply increase the flame on the burners. To lower the heat, reduce the flame or turn off one or more burners, depending on the number of burners your grill has.
Moving food around: If you find that one area of the grill is too hot, consider moving the food to a cooler section or indirectly grilling it. Rearranging the food can help ensure that everything cooks evenly.
By making these minor adjustments, you can maintain optimal cooking temperatures and achieve perfectly grilled food.
Sealing in juices
One of the advantages of direct grilling is the ability to seal in the juices, resulting in flavorful and succulent dishes. Here are some tips to help you seal in the juices during direct grilling:
Preheating the grill: Make sure the grill is properly preheated before placing the food on the grates. This will ensure a quick sear and help seal in the natural juices.
Avoid excessive flipping: Resist the temptation to constantly flip the food. Flipping the food too often can cause the juices to escape and result in drier meat. It’s best to flip the food only once during the cooking process.
Sear first: For meats, searing the outside over high heat before moving to indirect heat or lowering the temperature can help lock in the juices. This initial sear helps form a crust that keeps the moisture inside.
Remember that properly resting the food after grilling is equally important. Resting allows the juices to redistribute, resulting in a more tender and flavorful final product.
Creating grill marks
Beautiful grill marks not only add visual appeal to your dishes but also contribute to the overall flavor. Here are some tips for creating perfect grill marks:
Proper preheating: Ensure that the grill grates are properly preheated before placing the food on them. This will create the necessary heat transfer for creating well-defined grill marks.
Positioning the food: Place the food diagonally across the grill grates at a 45-degree angle. This allows for optimal contact with the hot grates, resulting in deep grill marks.
Resist the urge to move the food too soon: Once the food is placed on the grill, avoid moving it too soon. Allow it to develop grill marks before attempting to flip or rotate.
Rotate for crosshatch marks: If desired, rotate the food 90 degrees after the initial sear to create an attractive crosshatch pattern.
Grill marks not only add aesthetic appeal to your dishes but also create texture and depth of flavor. With practice, you’ll become a grill master in achieving those perfect grill marks.
Flipping and rotating techniques
Knowing when and how to flip or rotate your food is essential for achieving even cooking and optimal browning. Here are some techniques for flipping and rotating your food during direct grilling:
Use grill tongs: When it’s time to flip your food, use long grill tongs to turn it gently. Avoid using forks or sharp utensils, as they can pierce the meat and cause the juices to escape.
Checking for doneness: Monitor the cooking progress and check for doneness before flipping or rotating the food. Don’t flip too early, as it can cause sticking and result in uneven browning.
Rotating for even cooking: Depending on the size and shape of the food, you may need to rotate it during cooking to ensure even heat distribution. For larger cuts of meat or thicker vegetables, rotating can help prevent one side from overcooking.
Remember to be mindful of the cooking times for different foods, as flipping or rotating too frequently can interrupt the cooking process. Finding the right balance will result in perfectly cooked and evenly browned dishes.
Fire safety tips
Grilling involves open flames and high heat, making fire safety a top priority. Here are some essential fire safety tips to keep in mind when direct grilling:
Keep a fire extinguisher nearby: Always have a fire extinguisher within easy reach in case of any unexpected fires or flare-ups. Make sure you are familiar with its use before grilling.
Never leave the grill unattended: It’s crucial to keep a watchful eye on the grill at all times when it’s in use. Never leave it unattended, as flames can quickly escalate and cause accidents.
Keep a safe distance from flammable materials: Ensure that your grill is placed in a well-ventilated area, away from any flammable materials like trees, overhanging branches, or combustible surfaces.
Avoid overloading the grill: Overcrowding the grill with too much food can lead to flare-ups and uneven cooking. Provide enough space between the food items to prevent grease drippings from causing excessive flames.
By following these fire safety tips, you can enjoy a safe grilling experience and minimize the risk of accidents or injuries.
Avoiding food contamination
Preventing food contamination is crucial for a safe and enjoyable direct grilling experience. Here are some tips to avoid food contamination:
Proper storage and handling: Store raw and cooked meats in separate containers to prevent cross-contamination. Wash your hands thoroughly with soap and water before and after handling raw meat.
Use separate utensils and cutting boards: Use separate utensils and cutting boards for raw and cooked foods to prevent bacterial transfer. This reduces the risk of contamination and ensures safe food handling practices.
Safe defrosting: If using frozen meat, make sure to defrost it properly in the refrigerator or using the microwave’s defrost setting before grilling. Avoid defrosting meat at room temperature, as it encourages bacterial growth.
Use a meat thermometer: To ensure proper food safety, use a meat thermometer to check the internal temperature of the meat. This will help you determine if it has reached the safe cooking temperature.
By following these food safety measures, you can enjoy delicious grilled food without compromising your health and safety.
Safe handling of grilling tools
Proper handling of grilling tools is essential to prevent accidents and ensure a safe grilling experience. Here are some tips for safely handling your grilling tools:
Use long-handled tools: Opt for long-handled tools, such as tongs and spatulas, to prevent your hands from getting too close to the heat source. This minimizes the risk of burns and injuries.
Wear heat-resistant gloves: Heat-resistant gloves provide additional protection when handling hot grill grates, charcoal, or other items. Make sure the gloves are of good quality and provide sufficient heat resistance.
Keep a safe distance: Maintain a safe distance from the grill to avoid accidental contact with the hot surfaces. Avoid leaning over the grill or reaching across it when it’s in use.
Store tools properly: When not in use, store your grilling tools in a safe and organized manner. This ensures that they are not left within reach of children and minimizes the risk of accidents.
By prioritizing safety and proper handling of grilling tools, you can enjoy the grilling experience without any unnecessary mishaps.
Cleaning the grill after direct grilling
Cleaning the grill after each use is essential for maintaining its performance and preventing the buildup of residue and grease. Here’s a step-by-step guide for cleaning your grill after direct grilling:
Remove the grates: Carefully remove the grill grates from the grill, allowing them to cool slightly before handling.
Brush the grates: Use a grill brush with sturdy bristles to scrape off any food residue or charred bits from the grates. Apply gentle pressure to ensure thorough cleaning.
Soak the grates: If the grates are particularly dirty, you may need to soak them in warm, soapy water for a few minutes to loosen any stubborn residue. Scrub them with a sponge or brush and rinse thoroughly.
Clean the interior: Brush away any ash or debris from the bottom of the grill and clean the interior walls using warm, soapy water. Rinse thoroughly and wipe dry.
Empty and clean the ash catcher: If you’re using a charcoal grill, ensure that the ash catcher is empty and clean. Dispose of the ash properly and clean the catcher if necessary.
Wipe down the exterior: Give the exterior of the grill a wipe down with a damp cloth or sponge to remove any grease or dirt buildup.
Regular cleaning and maintenance not only prolong the life of your grill but also ensure optimal cooking results and prevent any potential health hazards.
Maintenance tips for grill longevity
Proper maintenance is key to extending the lifespan of your grill and ensuring its optimal performance. Here are some maintenance tips for grill longevity:
Regular cleaning: As mentioned earlier, regular cleaning is crucial for keeping your grill in top shape. Clean the grates, the interior, and the exterior after each use to prevent the buildup of grease and residue.
Oil the grates: After cleaning, lightly oil the grates to prevent rust and maintain their non-stick properties. Use a high-heat cooking oil and a paper towel to coat the grates evenly.
Check for wear and tear: Inspect your grill periodically for any signs of wear and tear, such as rusted or damaged parts. Repair or replace any damaged components to ensure safe and efficient operation.
Tighten loose connections: Due to regular use and exposure to heat, grill components may become loose over time. Check and tighten any loose connections to prevent accidents or malfunctions.
Store the grill properly: If you’re not using the grill for an extended period, make sure to store it in a dry and covered area. Protecting it from the elements will help prevent rust and other damage.
By following these maintenance tips, you’ll not only maximize the lifespan of your grill but also ensure that it performs flawlessly for many grilling seasons to come.
Proper storage of grill
Properly storing your grill is essential for protecting it from the elements and prolonging its lifespan. Here are some tips for storing your grill:
Clean the grill: Before storing the grill, make sure it is thoroughly cleaned and dried. Remove any grease, food residue, or ash to prevent odor, pests, or potential damage.
Disconnect the gas: If you have a gas grill, disconnect the propane tank or natural gas line before storing. Consult the grill’s user manual for proper instructions.
Cover the grill: Invest in a high-quality grill cover that is specifically designed for your grill model. Ensure that the grill is completely dry before covering it to prevent moisture and rust.
Choose the right storage location: Store the grill in a dry and well-ventilated area, away from extreme temperatures or direct sunlight. If possible, store it indoors or in a sheltered area to provide additional protection.
Secure loose parts: If your grill has any detachable parts, such as side shelves or grates, make sure they are stored securely to prevent damage or loss.
Proper storage not only protects your grill from damage but also saves you time and effort in preparing it for the next grilling season.
Overcooking on direct grilling
One common mistake when direct grilling is overcooking the food, resulting in dry or burnt dishes. Here’s how to avoid this:
Monitor the cooking time: Pay close attention to the recommended cooking times for different types of food. Use a timer if needed and check for doneness using a meat thermometer.
Use the right heat level: Adjust the heat to the appropriate level, depending on the type of food and desired doneness. High heat may lead to faster cooking but can also result in overcooking if not carefully monitored.
Resting the food: Allow the cooked food to rest for a few minutes before slicing or serving. This allows the juices to redistribute and ensures a more tender and flavorful result.
By being mindful of the cooking time and using accurate temperature measurements, you can avoid the pitfall of overcooking and enjoy perfectly grilled dishes.
Not allowing the grill to preheat
Another common mistake is not allowing the grill to preheat properly before placing the food on the grates. This often results in sticking and uneven cooking. Here’s how to avoid this:
Preheat the grill properly: Always preheat the grill for the recommended time before placing the food on the grates. This allows the grates to heat up and prevents food from sticking.
Maintain the optimal temperature: Keep the grill lid closed during preheating to allow the heat to build up inside. This will ensure consistent temperatures and optimal cooking conditions.
Be patient: Avoid rushing the preheating process. Give the grill enough time to reach the desired temperature, and resist the temptation to start cooking prematurely.
By allowing the grill to preheat properly, you’ll achieve better searing, prevent sticking, and ensure even cooking throughout.
Food sticking to grill grates
Food sticking to the grill grates is a common frustration. To prevent this from happening, follow these tips:
Clean and oil the grates: Thoroughly clean the grates after each use to prevent any residue from building up. Lightly oil the grates before placing the food on them. This helps reduce sticking and ensures easy food release.
Preheat the grill: Proper preheating is essential for developing a non-stick surface on the grates. Make sure the grill is preheated to the recommended temperature before placing the food on it.
Pat the food dry: Before grilling, pat the food dry with paper towels to remove excess moisture. This helps create a sear on the surface and prevents sticking.
Avoid excessive flipping: Only flip the food once during the cooking process. Constantly flipping the food can cause it to stick and break apart.
By incorporating these practices into your grilling routine, you’ll minimize sticking and enjoy easy food release from the grates.
Dousing flare-ups with water
Flare-ups, caused by grease or fat dripping onto the heat source, can lead to burnt or charred food. Avoid the mistake of dousing flare-ups with water, as it can cause more harm than good. Here’s what to do instead:
Keep a spray bottle of water nearby: Instead of dousing the flare-ups with water, keep a spray bottle filled with water near the grill. This allows for more controlled application and can help reduce flare-ups.
Move the food: If flare-ups occur, quickly move the food to a cooler part of the grill or temporarily remove it to prevent it from charring.
Use indirect grilling: If flare-ups persist, consider utilizing indirect grilling. This involves moving the food away from the direct heat source and cooking it with indirect heat. This will reduce the chances of flare-ups and allow for a more controlled cooking environment.
By practicing proper flame management and controlling flare-ups, you’ll avoid the risk of burnt food and maintain a safe grilling environment.
Grilling is a versatile cooking method that allows you to create delicious and flavorful dishes. Understanding the basics of direct grilling is essential for achieving optimal cooking results and enjoying a safe grilling experience. By following the tips and techniques outlined in this article, you’ll be well on your way to becoming a skilled and confident grill master. So fire up the grill, gather your favorite ingredients, and get ready to impress your family and friends with your direct grilling prowess!
