
You’ve come to the right place if you’re seeking the secret to perfectly smoked meat. Whether you’re an experienced grillmaster or just starting out, this article will reveal the best techniques for achieving mouthwatering, smoky goodness. From choosing the right wood chips to monitoring temperature, we will walk you through all the steps to elevate your BBQ game and create unforgettable flavors. Get ready to impress your family and friends with tender, juicy meat that will have them begging for seconds!

Understanding the Basics of Smoking Meat
Types of Smokers
When it comes to smoking meat, there are various types of smokers you can choose from. Each type has its own set of advantages and disadvantages, so it’s important to consider your needs and preferences before making a decision.
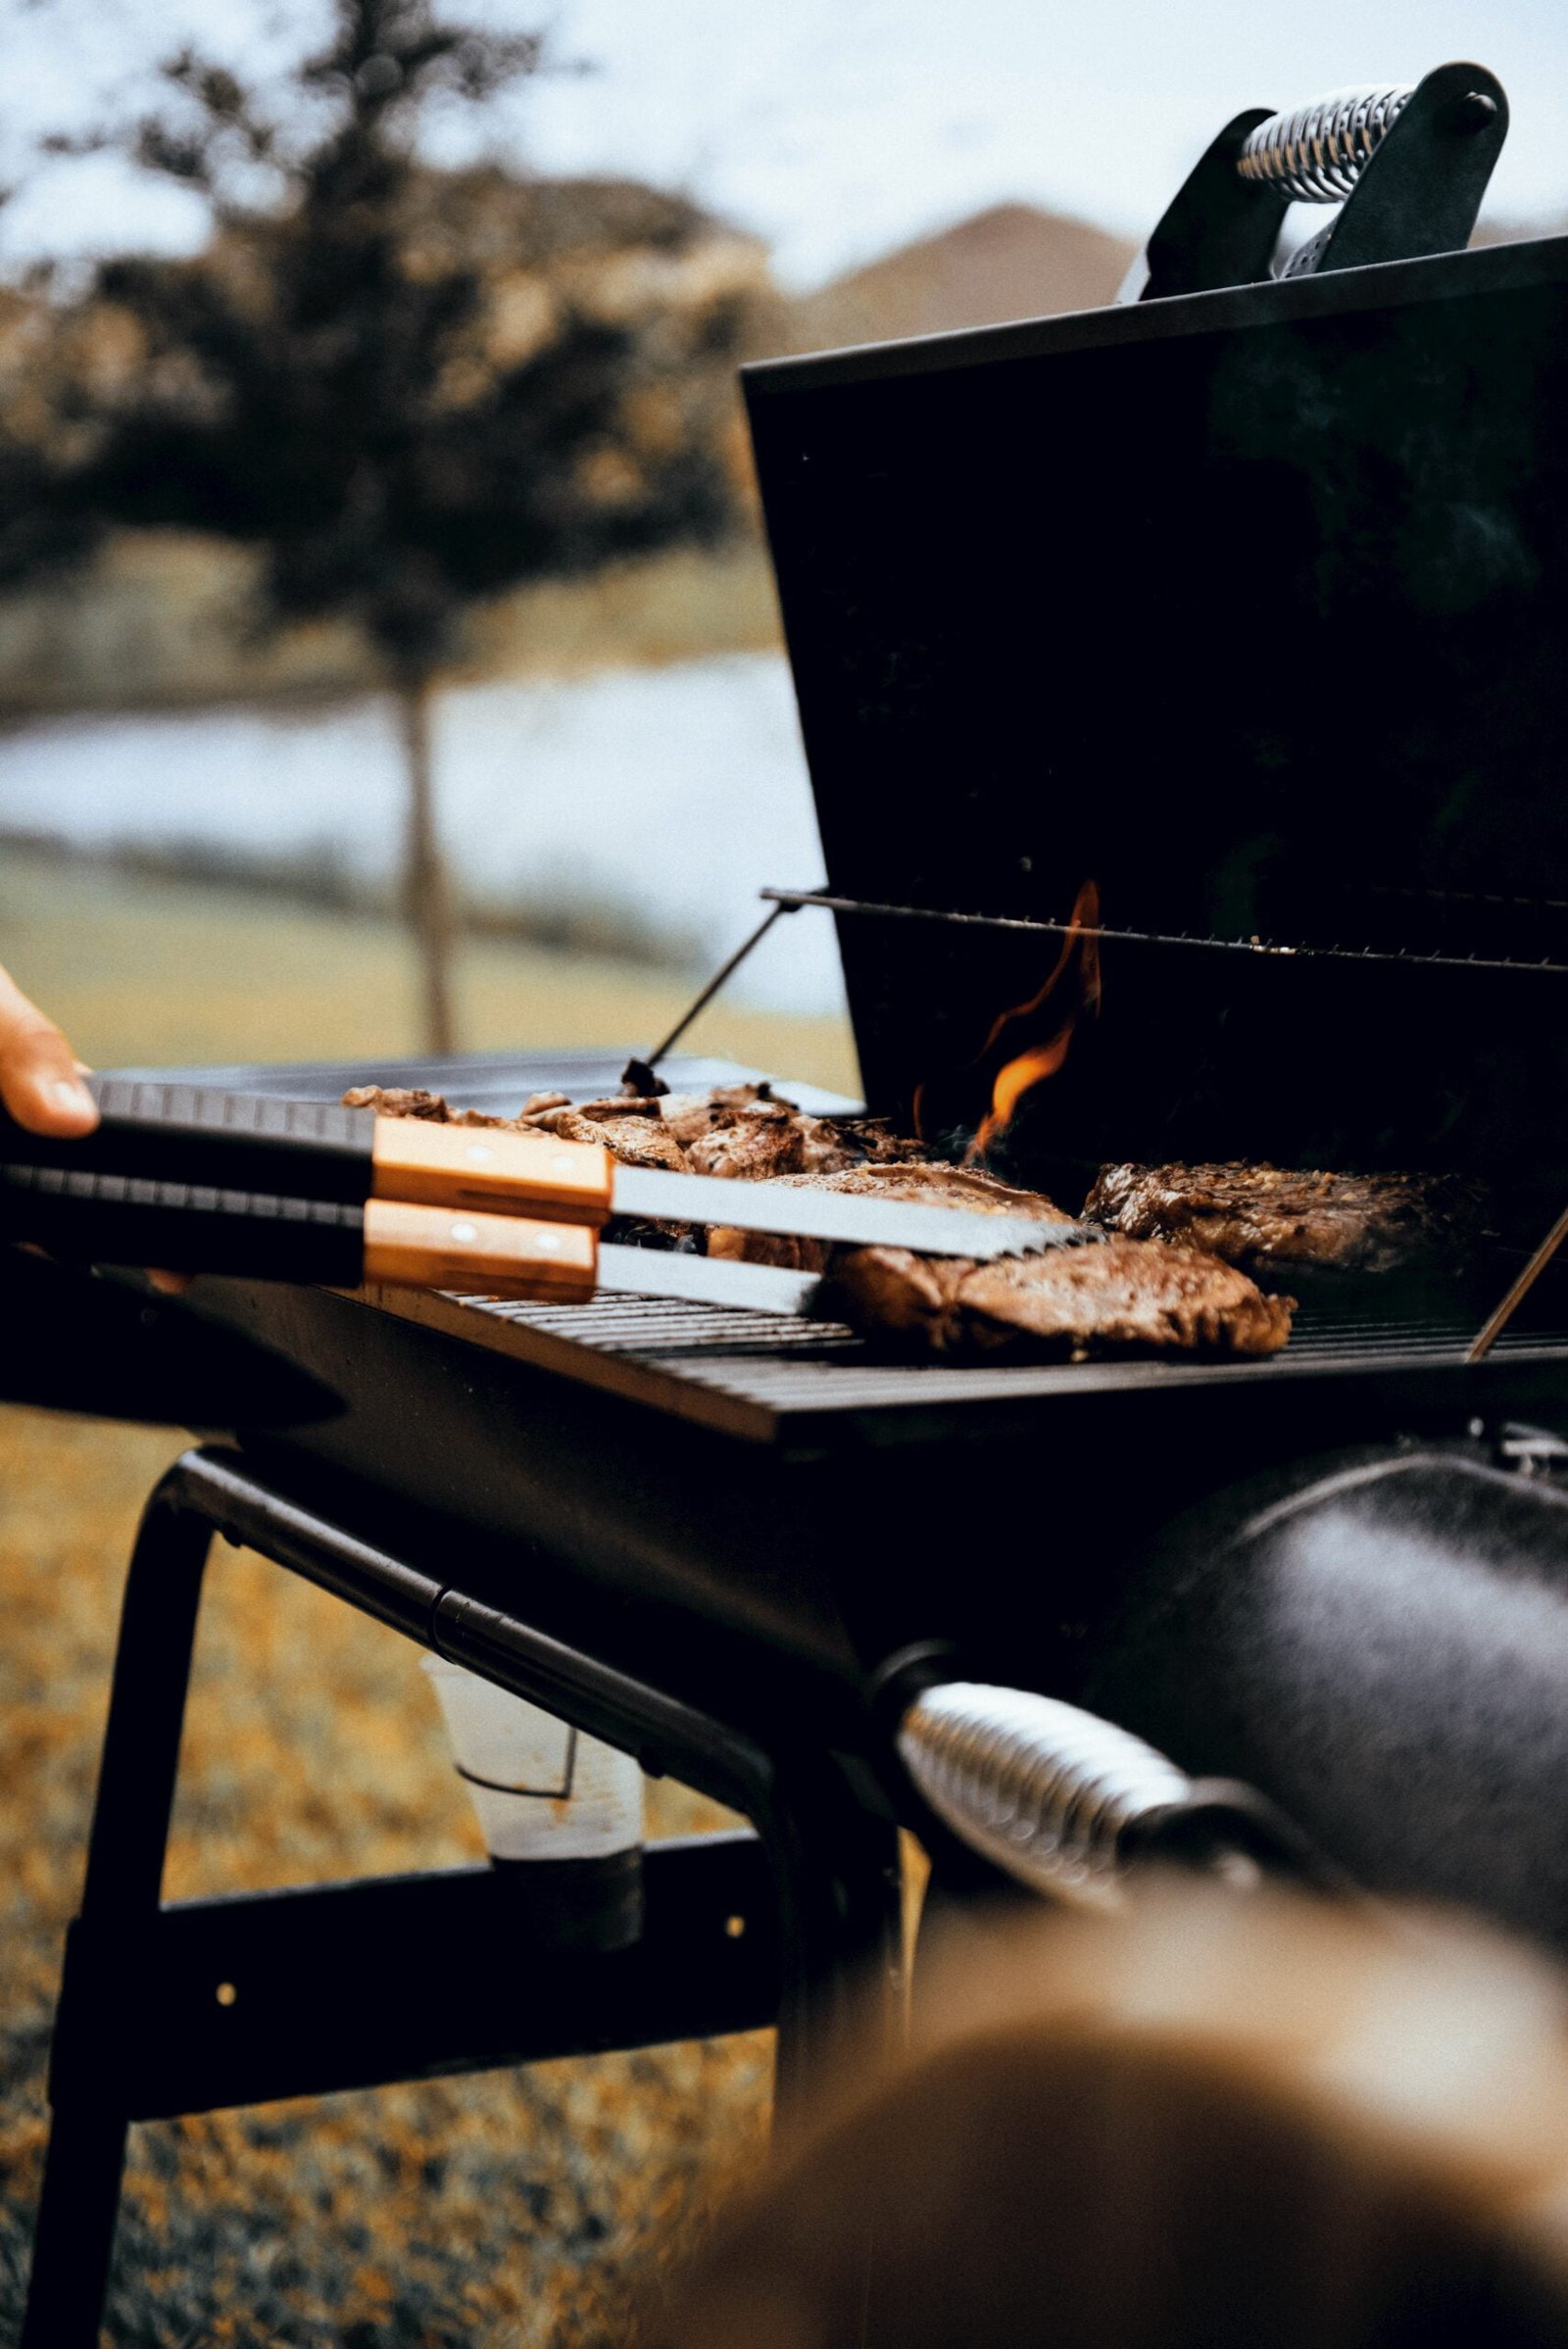
Charcoal Smokers: These are one of the most popular types of smokers. They use charcoal as the fuel source and rely on wood chips or chunks to produce smoke. Charcoal smokers offer a traditional smoky flavor and are known for their versatility.
Electric Smokers: Electric smokers are convenient and easy to use. They rely on electricity to heat up and produce smoke. They are a great option for beginners or those who prefer a more hands-off approach to smoking. Electric smokers also provide consistent temperature control.
Gas Smokers: Gas smokers use propane or natural gas to heat up and provide smoke. They are known for their convenience and quick heating time. Gas smokers offer precise temperature control and are a popular choice for those who want a hassle-free smoking experience.
Basic Temperature Guidelines
Maintaining the right temperature is crucial when smoking meat. Different types of meat require different internal temperatures to reach the desired level of doneness. Here are some basic temperature guidelines to keep in mind:
Poultry: Chicken and turkey should be cooked to an internal temperature of at least 165°F (74°C) for safe consumption.
Pork: Pork, including cuts like ribs, shoulder, and loin, should be smoked to an internal temperature of 145°F (63°C) for medium-rare or 160°F (71°C) for medium doneness.
Beef: For beef cuts like brisket, ribs, or steak, aim for an internal temperature of around 203°F (95°C) for tender and juicy meat.
It’s important to note that these are just general guidelines, and individual preferences may vary. Using a reliable meat thermometer is essential to ensure the meat is cooked to perfection.
Time It Takes to Smoke Different Meats
The smoking time for different meats can vary depending on several factors, including the size of the cut, the type of smoker used, and the target internal temperature. Here are some estimated smoking times for popular meats:
Chicken: A whole chicken can take approximately 2.5 to 3 hours to smoke until it reaches the safe internal temperature of 165°F (74°C).
Ribs: St. Louis style spare ribs usually take around 4 to 5 hours to smoke at a temperature of 225°F (107°C) until they are tender and juicy.
Brisket: Smoking a whole brisket can be a lengthy process, usually taking around 10 to 12 hours at a temperature of 225°F (107°C) until it reaches the desired tenderness.
It’s important to remember that these times are only estimates, and it’s always best to rely on internal temperatures to determine when the meat is done.
Choosing the Right Type of Wood
The type of wood you choose for smoking can greatly impact the flavor profile of your meat. Different types of wood impart their unique flavors, so it’s important to choose the right one to enhance the taste of your smoked creations.
Mesquite: Mesquite is a popular choice for those looking for a bold and intense smoky flavor. It pairs well with beef and pork but can be overpowering if used in excess.
Oak: Oak is a versatile wood that provides a more subtle and balanced smoke flavor. It is ideal for a wide range of meats, including beef, pork, and poultry.
Apple: Applewood is known for its mild and fruity flavor. It is a popular choice for smoking poultry, pork, and even fish.
Cherry: Cherrywood offers a sweet and slightly tart flavor. It works well with poultry, pork, and even game meats.
Alder: Alderwood provides a delicate and slightly sweet smoke flavor. It is commonly used for smoking fish, especially salmon.
Experimenting with different wood varieties can be a fun and exciting way to elevate your smoking experience and discover new flavor combinations that suit your palate.
Preparing the Meat for Smoking
Choosing the Right Cut of Meat
Selecting the right cut of meat is essential for a successful smoking session. Different cuts have different levels of fat marbling, texture, and cooking times, all of which can greatly affect the final result.
Brisket: Brisket is a classic choice for smoking, known for its rich flavor and tender texture. It is a tough cut that requires low and slow cooking to break down the connective tissues and achieve melt-in-your-mouth results.
Ribs: Whether you opt for spare ribs or baby back ribs, they are a staple in the world of smoking. Ribs are best when they have a good balance of meat and fat, allowing for moist and succulent results.
Pork Shoulder: Also known as a Boston butt, pork shoulder is perfect for pulled pork. It has a rich flavor and contains a good amount of fat, ensuring moist and flavorful results.
Chicken: Whole chickens, chicken thighs, or even wings are great options for smoking. They absorb the smoky flavors beautifully and develop a crispy skin that is hard to resist.
When choosing your cuts of meat, look for fresh and high-quality options. Talk to your local butcher for recommendations and guidance on the best cuts for smoking.
Trimming the Meat
Before smoking, it’s important to trim excess fat and any unwanted portions from the meat. Trimming not only helps improve the appearance of the final product but also ensures more even cooking and better smoke penetration.
Brisket: Trim away any hard fat or large chunks of fat from the brisket. Leave about 1/4-inch of fat to maintain moisture during the smoking process.
Ribs: Remove the membrane from the back of the ribs for tender and flavorful results. Trim off any excessive fat or loose meat to promote even cooking.
Pork Shoulder: Trim away any large chunks of external fat, leaving a thin layer to enhance flavor and moisture retention.
Chicken: Trim off any excess skin or fat, especially around the cavity area. This helps the smoke penetrate the meat and prevents greasy results.
Remember to use a sharp knife and take your time with the trimming process to ensure the best outcome.
Marinating and Seasoning Techniques
Marinating and seasoning your meat is a fantastic way to enhance the flavor and tenderness before smoking. Here are some popular techniques to consider:
Dry Rubs: Dry rubs are a blend of various spices and seasonings that are applied directly to the surface of the meat. They create a flavorful crust and help tenderize the meat. Common ingredients in dry rubs include salt, pepper, paprika, garlic powder, and brown sugar.
Wet Marinades: Wet marinades involve soaking the meat in a flavorful mixture of liquids and spices. This technique adds moisture and infuses the meat with aromatic flavors. Marinades can include ingredients like soy sauce, Worcestershire sauce, citrus juices, herbs, and spices.
Brining: Brining is the process of soaking the meat in a solution of salt, sugar, and liquid. It helps to enhance moisture retention and flavor. Brining is particularly useful for lean cuts of meat, such as chicken breasts or pork loin.
Experiment with different marinades and seasoning blends to create your signature flavor profile. Allow the meat to marinate for at least a few hours or overnight to maximize the depth of flavor.
Proper Thawing and Pre-smoking Handling
If you’re using frozen meat, it’s essential to thaw it properly before smoking. Improper thawing can lead to uneven cooking and compromise food safety. Here’s a safe method to thaw meat:
- Refrigerator Thawing: Place the frozen meat in a sealed container or ziplock bag and let it thaw in the refrigerator. This method requires patience, as it can take several hours to overnight depending on the size and thickness of the meat.
Avoid thawing meat at room temperature, as it can promote bacterial growth and increase the risk of foodborne illnesses.
Before smoking, allow the meat to come to room temperature for about 30 minutes to ensure even cooking. This also helps the meat absorb the flavors of the smoke more effectively.
Using a Charcoal Smoker
Building and Maintaining a Fire
Using a charcoal smoker adds that authentic, smoky flavor to your meat. Here’s how to build and maintain a fire in a charcoal smoker:
Start by placing a layer of charcoal in the smoker’s firebox. Use lump charcoal or briquettes, depending on your preference.
Create a small pyramid-shaped mound in the center of the firebox and light it. You can use lighter fluid, charcoal chimney starters, or an electric charcoal starter to ignite the coals.
Once the coals are lit, wait for them to turn ashen gray, indicating they are fully ignited and ready for cooking. This usually takes around 15-30 minutes.
Add flavored wood chips or chunks to the charcoal to generate smoke. Soak the wood chips in water for at least 30 minutes before using, to prevent them from burning too quickly.
Monitor the temperature inside the smoker using a built-in thermometer or an aftermarket digital thermometer. Adjust the airflow by opening or closing the vents to control the temperature.
As the cooking progresses, periodically add more charcoal and wood chips to maintain a steady heat and smoke production.
Controlling Temperature with Vents
The vents on a charcoal smoker play a crucial role in maintaining and controlling the temperature. Understanding how to use the vents effectively will help you achieve the desired temperature for your smoking process.
Lower Vents: The lower vents are usually located at the bottom of the smoker. They control the amount of airflow and, subsequently, the temperature. Opening the vents wide allows more oxygen into the firebox, increasing the temperature. Closing them partially restricts airflow and lowers the temperature.
Top Vent: The top vent is usually positioned on the lid of the smoker. It helps regulate the flow of smoke and heat out of the smoker. Adjusting the top vent controls the amount of smoke flavor and can help fine-tune the temperature.
Experiment with different vent settings to find the right combination that maintains a steady temperature throughout the smoking process. It’s important to make small adjustments and give the smoker time to stabilize before making further changes.
Utilizing a Water Pan for Moisture
Using a water pan in a charcoal smoker can help maintain moisture levels during the smoking process. The water pan serves multiple purposes:
Moisture: The water evaporates, creating a moist environment inside the smoker. This prevents the meat from drying out and enhances tenderness.
Temperature Regulation: The water pan acts as a heat sink, absorbing and distributing heat evenly throughout the smoker. This helps stabilize the cooking temperature and reduces temperature fluctuations.
Smoke Management: The water pan also helps regulate smoke production. The water vapor helps capture smoke particles, ensuring a smoother and more consistent flow of smoke over the meat.
Fill the water pan with hot water before placing it in the smoker. Monitor the water level throughout the smoking process and add more hot water as needed to maintain a steady level.
Using an Electric Smoker
Benefits of an Electric Smoker
Electric smokers offer a convenient and user-friendly smoking experience. Here are some benefits of using an electric smoker:
Ease of Use: Electric smokers are incredibly easy to use, making them a great option for beginners. Simply plug in the smoker, set the desired temperature, and add wood chips for smoke production.
Temperature Control: Electric smokers provide precise temperature control, allowing you to set and maintain the desired temperature without constant monitoring.
Consistency: Electric smokers offer consistent temperature and smoke production, eliminating the need for constant adjustments during the smoking process.
Efficiency: Electric smokers are energy-efficient, utilizing electricity as their fuel source. They require minimal maintenance and cleanup compared to other types of smokers.
Setting Up and Using a Smoker
Using an electric smoker is straightforward. Here’s how to set up and use an electric smoker effectively:
Preheat the smoker: Preheat the smoker to the desired temperature. Most electric smokers come with a built-in thermometer or temperature control panel, making it easy to set the desired temperature.
Add Wood Chips: Electric smokers usually have a designated wood chip tray. Add your preferred wood chips to the tray, following the manufacturer’s instructions. Soaked wood chips provide a slower and more consistent smoke output.
Place the Meat: Once the smoker is preheated and producing smoke, place the meat onto the cooking grates. Ensure that the meat is properly spaced to allow for even smoking and airflow.
Monitor the Temperature: Keep an eye on the smoker’s temperature throughout the smoking process. Adjust the temperature settings as needed to maintain the desired temperature.
Add Wood Chips as Needed: Depending on your preference for smoke intensity, periodically add more wood chips to the designated tray. Avoid adding too many chips at once to prevent excessive smoke production.
Important Safety Tips
When using an electric smoker, it’s crucial to prioritize safety. Here are some important safety tips to keep in mind:
Read the Manual: Familiarize yourself with the manufacturer’s instructions and safety guidelines provided in the smoker’s manual. Pay attention to electrical and usage instructions.
Outdoor Use Only: Never use an electric smoker indoors or in enclosed spaces. Electric smokers produce smoke and can release potentially harmful gases during the smoking process. Always operate the smoker outside in a well-ventilated area.
Water Safety: Some electric smokers may have a water pan or water tray for moisture. Ensure that all electrical components are kept dry and away from water to prevent electrical hazards.
Power Supply: Use a dedicated circuit for your electric smoker, and avoid using extension cords. Make sure the power supply is suitable for the output of the smoker.
Seated Power Cord: Ensure that the power cord is correctly seated in the smoker and the power outlet. Loose connections can cause electrical issues and safety hazards.
Fire Safety: Always keep a fire extinguisher nearby when using any type of smoker. Additionally, never leave an electric smoker unattended while it is in operation.
By following these safety tips, you can enjoy the convenience and ease of using an electric smoker while ensuring a safe cooking environment.

Using a Gas Smoker
Pros and Cons of Gas Smokers
Gas smokers, also known as propane smokers, offer a convenient and efficient way to smoke meat. Here are some pros and cons of using a gas smoker:
Pros:
Temperature Control: Gas smokers provide precise temperature control, allowing you to adjust and maintain the desired temperature throughout the smoking process. This makes it easier to achieve consistent results.
Quick Heating: Gas smokers heat up quickly, reducing the preheating time compared to other types of smokers. This saves time and allows you to start smoking your meat sooner.
Clean-Burning: Propane is a clean-burning fuel, resulting in less residue buildup on the meat and easier cleanup afterward. It produces a cleaner and milder smoke flavor compared to other fuel sources.
Convenience: Gas smokers are often considered more convenient to use compared to charcoal or wood smokers. They eliminate the need for constant monitoring and adjustment and require less maintenance during the smoking process.
Cons:
Smoke Flavor: Some pitmasters claim that gas smokers produce less intense smoke flavor compared to traditional wood or charcoal smokers. However, this can be adjusted by using wood chips or chunks in the smoker box to add additional smoke flavor.
Portability: Gas smokers generally rely on propane tanks as a fuel source, which can be bulky and limit the portability of the smoker. They may not be as suitable for outdoor adventures or locations without easy access to propane.
Higher Initial Cost: Gas smokers can be more expensive initially compared to other types of smokers. However, they may help save on fuel costs in the long run due to their efficiency and use of propane.
Controlling Temperature with Gas Smokers
Controlling the temperature in a gas smoker is relatively simple. Here’s how to maintain the desired temperature using a gas smoker:
Preheat the smoker: Start by preheating the smoker to the desired temperature. Most gas smokers have a control knob or dial to set the temperature. Follow the manufacturer’s instructions to ensure proper preheating.
Monitor the Temperature: Use a reliable thermometer to monitor the temperature inside the smoker. Place the thermometer near the area where the meat will be cooking for more accurate readings.
Adjust Gas Flow: To raise the temperature inside the smoker, increase the gas flow by turning the control knob or dial clockwise. To lower the temperature, decrease the gas flow by turning it counterclockwise. Make small adjustments to avoid large temperature fluctuations.
Ventilation: Some gas smokers may have adjustable vents that can help control the amount of heat and smoke inside the smoker. Adjust the vents to allow for proper airflow and temperature regulation.
Weather Considerations: Keep in mind that external factors, such as wind or cold weather, can affect the temperature inside the gas smoker. Make adjustments as necessary to maintain a consistent temperature.
Achieving the Best Flavor with Gas Smokers
While gas smokers may produce a milder smoke flavor compared to other types of smokers, you can still achieve excellent flavor with these tips:
Use Wood Chips: To enhance the smoke flavor, add wood chips or chunks to the smoker box or foil packet. Soak the wood chips in water for at least 30 minutes before adding them to the smoker. This allows the wood to smolder and release smoke, infusing the meat with flavorful aromas.
Choose the Right Wood: Experiment with different types of hardwoods to add more complexity to the smoke flavor. Some popular options include hickory, mesquite, apple, cherry, and maple. Each wood variety offers its own unique flavor profile.
Pre-Smoke Seasoning: Consider marinating or seasoning the meat before placing it in the gas smoker. This will help impart additional flavors into the meat and enhance the overall taste.
Combining the convenience of gas smokers with these flavor-enhancing techniques will result in delicious and satisfying smoked meats.
Managing Heat and Smoke
Understanding Direct and Indirect Heat
When smoking meat, it’s important to understand the concepts of direct and indirect heat:
Direct Heat: Direct heat refers to cooking meat directly over the heat source. This method is ideal for searing, grilling, and quickly cooking thinner cuts of meat. However, direct heat is not suitable for long, slow smoking sessions where tenderness and smoke absorption are the main goals.
Indirect Heat: Indirect heat refers to cooking meat away from the direct heat source. This allows for a slower and more controlled cooking process. It is the preferred method for smoking, as it allows the meat to absorb the smoky flavors and break down connective tissues over an extended period.
Most smokers utilize indirect heat by placing the meat on a separate cooking grate away from the heat source. This ensures a more even and gentle cooking process, resulting in tender and flavorful meat.
Ideal Smoking Temperatures
Maintaining the ideal smoking temperature is crucial for achieving the best results. Different meats require different temperature ranges to reach the desired level of doneness and tenderness. Here are some general temperature guidelines for smoking meat:
Poultry: Chicken and turkey should be smoked at a temperature range of 225°F to 250°F (107°C to 121°C). This ensures thorough cooking and safe consumption.
Pork: Pork cuts, such as ribs or pork shoulder, are best smoked at a temperature range of 225°F to 250°F (107°C to 121°C). This allows for low and slow cooking, resulting in tender and juicy results.
Beef: For beef cuts like brisket or ribs, aim for a temperature range of 225°F to 250°F (107°C to 121°C) as well. This allows for the breakdown of collagen, resulting in tender and flavorful meat.
Remember that these temperature ranges are just guidelines, and individual preferences may vary. Always use a reliable thermometer to ensure the meat is cooked to the desired internal temperature.
Essential Tools for Reading Temperature
Accurate temperature readings are essential when smoking meat. Here are some essential tools you should have on hand:
Meat Thermometer: A meat thermometer is crucial for monitoring the internal temperature of the meat. Choose a high-quality digital thermometer with a probe for accurate readings.
Instant-Read Thermometer: An instant-read thermometer is useful for quick temperature checks during the smoking process. It provides immediate results, allowing you to make necessary adjustments if needed.
Ambient Thermometer: An ambient thermometer measures the temperature inside the smoker. It helps ensure that the smoker maintains a steady temperature throughout the smoking session.
Investing in reliable thermometers will help you achieve consistent and perfectly cooked meat every time.

Mastering the Art of Low and Slow
Generational Secrets of Slow Cooking
Low and slow cooking is the hallmark of smoking meat and has been passed down through generations. This technique allows the meat to gradually break down, resulting in tender, flavorful, and melt-in-your-mouth results.
Here are some generational secrets to mastering the art of low and slow cooking:
Patience: Smoking meat requires patience. Allow the meat to cook slowly over a long period, resisting the temptation to rush the process. Low and slow cooking allows the flavors to develop and ensures maximum tenderness.
Maintain a Steady Temperature: Consistency is key when it comes to low and slow cooking. Monitor and maintain a steady temperature throughout the smoking session. This ensures that the meat cooks evenly and prevents dryness or toughness.
Quality Fuel and Smoke: Use high-quality charcoal or wood chips to generate a clean and consistent heat source. Ensure proper ventilation to allow for proper smoke circulation and flavor absorption.
Time for Resting: After the meat is smoked, allow it to rest for a period of time before slicing. Resting allows the meat to reabsorb the juices, resulting in moister and more tender results.
By embracing these generational secrets, you can embark on a flavorful and rewarding journey of low and slow cooking.
Preventing and Dealing with Stalls
A stall occurs when the internal temperature of the meat plateaus or stops rising during the smoking process. This phenomenon is common when smoking larger cuts of meat, such as brisket or pork shoulder. Stalls can be frustrating but can be managed effectively. Here’s what you can do:
Maintain Consistency: During a stall, it’s important to maintain a consistent temperature inside the smoker. Avoid increasing the temperature in an attempt to speed up the cooking process as it can lead to uneven results.
Be Patient: Patience is crucial during a stall. As the meat plateaus, it is undergoing a process called evaporative cooling, where moisture evaporates from the surface, causing a temporary drop in temperature. This is normal and an essential part of the cooking process.
Wrap in Foil: To reduce the duration of a stall, you can wrap the meat in foil once it reaches a certain internal temperature (usually around 160°F to 165°F/71°C to 74°C). This technique, known as the “Texas crutch,” helps retain moisture and accelerates the cooking process, bypassing the stall.
By understanding and working through a stall with these techniques, you can continue on your smoking journey with confidence and achieve tender and delicious results.
Wrapping Meat to Finish Cooking
Wrapping meat is a technique often employed during the smoking process to help tenderize and retain moisture. There are two main wrapping methods to consider:
Foil Wrap: Wrapping the meat in foil, also known as the Texas crutch, is a common technique used to speed up the cooking process. It helps retain moisture and heat, resulting in faster tenderization. Foil wrapping is often used to power through a stall and achieve tender results.
Butcher Paper Wrap: Butcher paper wrapping, often associated with barbecue from Central Texas, allows the meat to continue cooking while still allowing some evaporation. It helps develop a beautiful bark or crust, while also retaining moisture and imparting a subtle smoky flavor.
When deciding whether to wrap your meat, consider the specific cut and cooking time. Experiment with both methods to find the technique that best suits your preferences and desired outcome.
Adding Flavor with Smoke
Different Wood Varieties and Their Flavors
The choice of wood for smoking greatly influences the flavor profile of the meat. Here are some popular wood varieties and their unique flavors:
Mesquite: Mesquite wood produces a strong and intense smoky flavor with a slightly sweet and tangy undertone. It pairs well with beef and game meats.
Hickory: Hickory is a robust and bold wood with a strong smoky flavor. It is popularly used with pork, beef, and poultry. Hickory can be overwhelming when used in excess, so it’s best to use it in moderation.
Apple: Applewood offers a mild, fruity, and slightly sweet smoke flavor, adding a touch of sweetness to the meat. It is ideal for poultry, pork, and even fish.
Cherry: Cherrywood provides a sweet and slightly tart smoke flavor. It imparts a beautiful reddish hue to the meat and pairs well with poultry, pork, and game meats.
Pecan: Pecan wood offers a rich, nutty, and slightly sweet smoke flavor. It complements a wide range of meats, including beef, pork, and poultry.
Each wood variety provides a unique flavor profile, allowing you to create a customized and memorable smoking experience.
How to Apply Smoke Effectively
Applying smoke effectively is crucial to infuse the meat with rich and flavorful aromas. Here’s how to apply smoke for the best results:
Start Early: Begin adding smoke as soon as the meat goes into the smoker. This allows the meat to absorb the maximum amount of smoke flavor during the entire cooking process.
Use Smaller Wood Pieces: Opt for smaller wood chips or chunks to ensure a consistent and steady smoke production. Smaller wood pieces smolder more slowly and produce a continuous stream of smoke.
Soak Wood Chips: If you’re using wood chips, soak them in water for at least 30 minutes before adding them to the smoker. Soaking helps prolong the smoldering process and prevents the chips from burning too quickly.
Time It Right: Remember that smoke absorption is most effective during the first half of the smoking process. After a certain point, the meat’s surface becomes less porous, limiting smoke penetration. Aim to add smoke during this critical period for optimal flavor infusion.
By applying smoke effectively, you can elevate the taste, aroma, and overall experience of your smoked meats.
Avoiding Over Smoking
While smoke imparts incredible flavor, it’s important to avoid over smoking, as excessive smoke can overwhelm the taste of the meat. Here’s how to avoid over smoking:
Moderation is Key: Use your wood chips or chunks in moderation, especially if you’re using stronger woods like mesquite or hickory. Start with a small amount and adjust as necessary to achieve the desired smoke flavor.
Balance with Cooking Time: Smoke flavor intensifies during longer cooking times. If you prefer a milder smoke flavor, consider reducing the overall cooking time or using a milder wood variety.
Taste and Adjust: During the smoking process, periodically sample the meat to gauge the intensity of the smoke flavor. If it’s too strong, you can wrap the meat to limit further smoke absorption or adjust the type and amount of wood used.
Finding the perfect balance of smoke flavor requires some experimentation. Trust your taste buds and make adjustments along the way to create the ultimate smoked masterpiece.
Post-smoking Techniques
Resting and Slicing the Meat
After the smoking process is complete, it’s crucial to let the meat rest before slicing. Resting allows the juices to redistribute evenly throughout the meat, resulting in a juicier and more flavorful final product. Here’s how to rest and slice your meat properly:
Resting: Remove the meat from the smoker and let it rest on a cutting board or a clean surface. Tent it loosely with aluminum foil to trap the heat and retain moisture. Rest times can vary depending on the size of the meat, but a general guideline is to rest for at least 15 to 30 minutes.
Slicing: Once the meat has rested, it’s time to slice it. Use a sharp knife to cut the meat against the grain for maximum tenderness. The grain refers to the direction of the muscle fibers. Slicing against the grain helps break up the fibers, resulting in more tender and easier-to-chew meat.
Take your time when slicing and enjoy the tantalizing aroma that fills the air. Savor each slice of perfectly smoked meat.
Storing and Reheating Methods
If you have leftover smoked meat or want to prepare in advance, proper storage and reheating methods are essential to maintain flavor and quality. Here’s how to store and reheat smoked meat effectively:
Storage: Once the meat has cooled, wrap it tightly in plastic wrap or place it in an airtight container. Store it in the refrigerator for up to four days. For longer storage, consider freezing the meat, ensuring it is properly wrapped to prevent freezer burn.
Reheating: When reheating smoked meat, it’s important to prevent it from drying out. Gently reheat the meat in a covered baking dish in the oven at a low temperature, around 275°F (135°C). You can also use a stovetop or microwave, but be cautious to avoid overheating and drying out the meat.
Always ensure the reheated meat reaches the proper internal temperature for safe consumption: 165°F (74°C) for poultry and at least 145°F (63°C) for pork and beef.
Different Ways to Serve Smoked Meat
Smoked meat is incredibly versatile and can be served in various ways. Here are some popular serving suggestions:
Sandwiches: Thinly slice smoked meat and pile it high in a hearty sandwich. Consider adding BBQ sauce, pickles, and coleslaw for a classic combo.
Tacos: Shred smoked meat and stuff it into soft tortillas. Top with your favorite salsa, guacamole, and other taco fixings for a flavorful and satisfying meal.
Salads: Add sliced or diced smoked meat to salads for a protein-packed twist. It adds a smoky, hearty element to leafy greens or grain salads.
Platters: Create a smoke-filled platter by arranging sliced smoked meat with a variety of sides and condiments. This is perfect for gatherings or special occasions.
Pizza Toppings: Add sliced or pulled smoked meat as a topping for homemade or store-bought pizzas. It adds a unique smoky flavor to the beloved dish.
Get creative and experiment with different serving ideas to make the most out of your mouthwatering smoked meat.
Troubleshooting Common Problems
Resolving Temperature Fluctuations
Maintaining a consistent temperature is crucial when smoking meat. Here’s how to troubleshoot and resolve temperature fluctuations:
Monitor Airflow: Ensure that the smoker’s vents are adequately adjusted. Proper airflow helps regulate the temperature and prevents fluctuations.
Check for Leaks: Inspect the smoker for any leaks or gaps that may allow excess airflow. Use heat-resistant silicone or gaskets to seal any openings and improve temperature control.
Shield from Wind: Wind can cause temperature fluctuations. Position the smoker in a sheltered area or use windbreaks to protect it from strong gusts.
Use Thermal Mass: Adding thermal mass, such as heat sinks or water pans, can help regulate and stabilize temperature fluctuations. These provide additional insulation and retain heat.
By troubleshooting these factors, you can achieve more consistent temperatures and ensure that your meat is cooked perfectly every time.
Dealing with Too Much or Too Little Smoke
Getting the right balance of smoke is crucial for a delicious outcome. Here’s how to tackle common issues of too much or too little smoke:
Too Much Smoke: If you find that your meat is becoming overly smoky, consider reducing the amount of wood chips or chunks used. Make sure to soak the wood chips beforehand to slow down the combustion process and prolong smoldering. Adjusting the vent settings or limiting the smoking time can also help reduce excessive smoke.
Too Little Smoke: If you’re not getting enough smoke flavor, try increasing the amount of wood chips or chunks used. Ensure that the wood is dry and ready for smoking. Adjusting the vent settings to allow for more airflow can also bolster smoke production.
Finding the right balance of smoke requires some trial and error. Pay attention to the smoke output and make adjustments accordingly to achieve your desired level of smokiness.
Addressing Dry and Tough Meat
Dry and tough meat can be disappointing after hours of smoking. Here’s how to address this common issue:
Insufficient Moisture: Ensure you are maintaining a moist environment during the smoking process. Use a water pan or spritz the meat with a liquid, such as apple juice or a marinade, to add moisture. Wrapping the meat in foil during the latter part of the smoking process can also help retain moisture.
Overcooking: Overcooking can lead to dry and tough meat. Monitor the internal temperature of the meat using a thermometer and remove it once it reaches the desired level of doneness. Wrapping the meat in foil or butcher paper can also help prevent overcooking.
Resting: Allowing the meat to rest after smoking is crucial for retaining moisture. Follow proper resting techniques to ensure the juices redistribute throughout the meat, resulting in a moist and tender final product.
Experimenting with different techniques and understanding the nuances of your specific smoker will help you overcome dry and tough meat, allowing you to savor the true joy of smoking.