Grilling season is here and no one wants to be the one known for serving up burnt hamburgers or raw chicken. To ensure your backyard barbecues are a hit, it’s important to be mindful of some of the common mistakes to avoid when grilling. Whether it’s using high heat for too long or not properly preheating the grill, these simple tips will help you achieve perfectly cooked and flavorful dishes every time. So grab your apron and spatula, because we’re about to take your grilling game to the next level.

Not Preheating the Grill
Importance of preheating the grill
Preheating the grill is an essential step to ensure your food cooks evenly and to perfection. By preheating, you allow the grill grates to reach the desired temperature, which helps prevent food from sticking to the surface. It also creates those beautiful grill marks that add a touch of professional presentation to your dishes. Additionally, preheating allows any excess grease or residue from previous cookouts to burn off, which improves the overall cleanliness of the grill.
How long to preheat the grill
The duration of preheating depends on the type of grill you’re using. For gas grills, it typically takes about 10-15 minutes to reach the desired temperature. Allow the burners to heat up fully before placing any food on the grill grates. For charcoal grills, it’s important to wait until the charcoal briquettes have turned gray and ashy, indicating that they are at their peak heat. This can take anywhere from 20-30 minutes. Remember, patience is key when preheating your grill!
Consequences of not preheating
Not preheating the grill can have several negative consequences. Firstly, your food may stick to the grill grates, making it difficult to flip and resulting in unappetizing-looking grill marks. The uneven heat distribution can also lead to undercooked or overcooked parts of your food. Without preheating, your cooking times may be longer, and you risk losing those precious juices and flavors that make grilled food so delicious. Preheating is a quick and easy step that sets the foundation for a successful grilling session, so don’t skip it!
Ignoring Safety Precautions
Keeping a safe distance
When grilling, it’s crucial to maintain a safe distance between yourself, the grill, and any combustible materials. Ensure that your grill is set up in a well-ventilated area, away from the house, walls, or low-hanging branches. This precaution helps minimize the risk of accidents or fires caused by the heat generated by the grill.
Using protective gloves
Investing in a pair of heat-resistant gloves is a wise decision when it comes to grilling. These gloves provide a protective barrier between your hands and the hot surfaces of the grill. They allow you to handle hot grill grates, utensils, and even hot food without risking burns or injuries. So don’t forget to slip on those gloves before you fire up the grill!
Having a fire extinguisher
Having a fire extinguisher nearby is an essential safety measure that every grill master should take. Accidents happen, and a small flame can quickly escalate into a dangerous situation. Make sure you have a working fire extinguisher within reach, properly maintained and charged. It’s better to be prepared and never have to use it than to find yourself in an emergency without a way to extinguish a fire.
Using Dirty Grill Grates
How dirt affects the taste
Dirty grill grates not only pose a health risk but can also affect the taste of your food. Residue from previous cooking sessions, grease, and even bits of food stuck on the grates can impart unpleasant flavors onto your grilled dishes. These flavors can be transferred to your food and result in an unappetizing taste. Keeping your grill grates clean ensures that the true flavors of your food shine through.
Methods for cleaning grates
Cleaning your grill grates doesn’t have to be a daunting task. One easy method is to scrape the grates with a grill brush while they are still hot. The heat helps to loosen any stuck-on residue, making it easier to remove. Another effective cleaning method is to soak the grates in warm, soapy water for a while and then scrub them with a brush or sponge. For tougher stains, you can create a paste using baking soda and water and apply it to the grates before scrubbing.
Best time to clean the grates
It’s best to clean your grill grates after every use or at least before each grilling session. By doing so, you remove any lingering residue from previous cookouts and ensure a clean cooking surface for your food. Cleaning the grates while they are still warm from preheating can make the process easier, as any grease or food particles are less likely to be stuck on. Regular cleaning not only keeps your grates sanitary but also prolongs their lifespan.
Failing to Oil the Grill Grates
Benefits of oiling the grates
Oiling the grill grates is a simple step that provides several benefits. Firstly, it helps prevent food from sticking to the surface, making it easier to flip and remove from the grill. This also ensures your food retains its shape and presentation. Secondly, oiling the grates adds a touch of flavor to your food, as the oil helps conduct heat and encourages the caramelization process. Lastly, the oil forms a protective barrier on the grates, preventing rust and extending their lifespan.
Type of oil to use
Choosing the right oil is important when it comes to grilling. Opt for oils with a high smoke point, such as vegetable oil, canola oil, or peanut oil. These oils can withstand high temperatures without burning or producing acrid smoke that can affect the taste of your food. Avoid using olive oil or butter, as their lower smoke points make them more suitable for lower-heat cooking methods.
How and when to apply oil
To oil the grill grates, simply soak a paper towel in oil and, using tongs, rub it onto the grates before preheating. This method helps ensure even coverage and minimizes the risk of flare-ups. Another popular technique is to use a grill spray or non-stick cooking spray, specifically designed for grilling. Apply the spray to the grates before lighting the grill. Whichever method you choose, make sure to apply the oil or spray before preheating to allow the grates to absorb it properly.

Overcrowding the Grill
How overcrowding affects cooking
Overcrowding the grill is a common mistake that can greatly affect the final outcome of your grilled dishes. When food is packed tightly together, it can obstruct proper airflow and lead to uneven cooking. The lack of space between items prevents heat from circulating effectively, resulting in some parts being overcooked while others remain undercooked. Overcrowding can also lead to excess moisture buildup, preventing those desired grill marks from forming.
Right amount of food to grill at a time
Knowing how much food to grill at a time is key to avoiding overcrowding. As a general rule, leave enough space between items to ensure proper heat circulation. Allow at least an inch of space between each piece of food to promote even cooking. If you have a large amount of food to grill, consider cooking it in batches or using multiple grills to maintain proper heat distribution.
Signs you’re overcrowding the grill
Several signs indicate that you may be overcrowding the grill. If you notice that your food is taking longer to cook than usual or that some pieces are significantly undercooked while others are overcooked, it’s a clear sign that the grill is overcrowded. Additionally, if you’re unable to achieve those beautiful grill marks or if there is excessive smoke or flare-ups, it’s time to reduce the amount of food on the grill and give each item enough space to cook properly.
Constantly Flipping Food
Effects of frequent flipping
Constantly flipping your food on the grill can have negative consequences. Each time you flip, you interrupt the cooking process and prolong the overall cooking time. Flipping too often can also lead to uneven cooking, as the food doesn’t have enough time to develop those delicious caramelized flavors. Additionally, excessive flipping increases the risk of food sticking to the grill grates, resulting in an unattractive and messy presentation.
Correct flipping technique
To achieve perfectly cooked food, it’s important to follow the correct flipping technique. Resist the temptation to constantly flip and instead allow your food to cook undisturbed for a few minutes. Once it’s time to flip, use a spatula or tongs to lift and turn the food gently. Avoid pressing down on the food, as this can cause the precious juices to escape, resulting in a drier end product.
Signs it’s time to flip the food
Knowing when to flip your food is crucial to achieve optimal results. One clear sign that it’s time to flip is when the food easily lifts from the grill grates without sticking. If you notice that the edges of your food are starting to brown or that grill marks have formed on one side, it’s usually an indication that it’s time to give it a flip. Trust your instincts and remember that patience is key. Let the grill work its magic before attempting to flip.

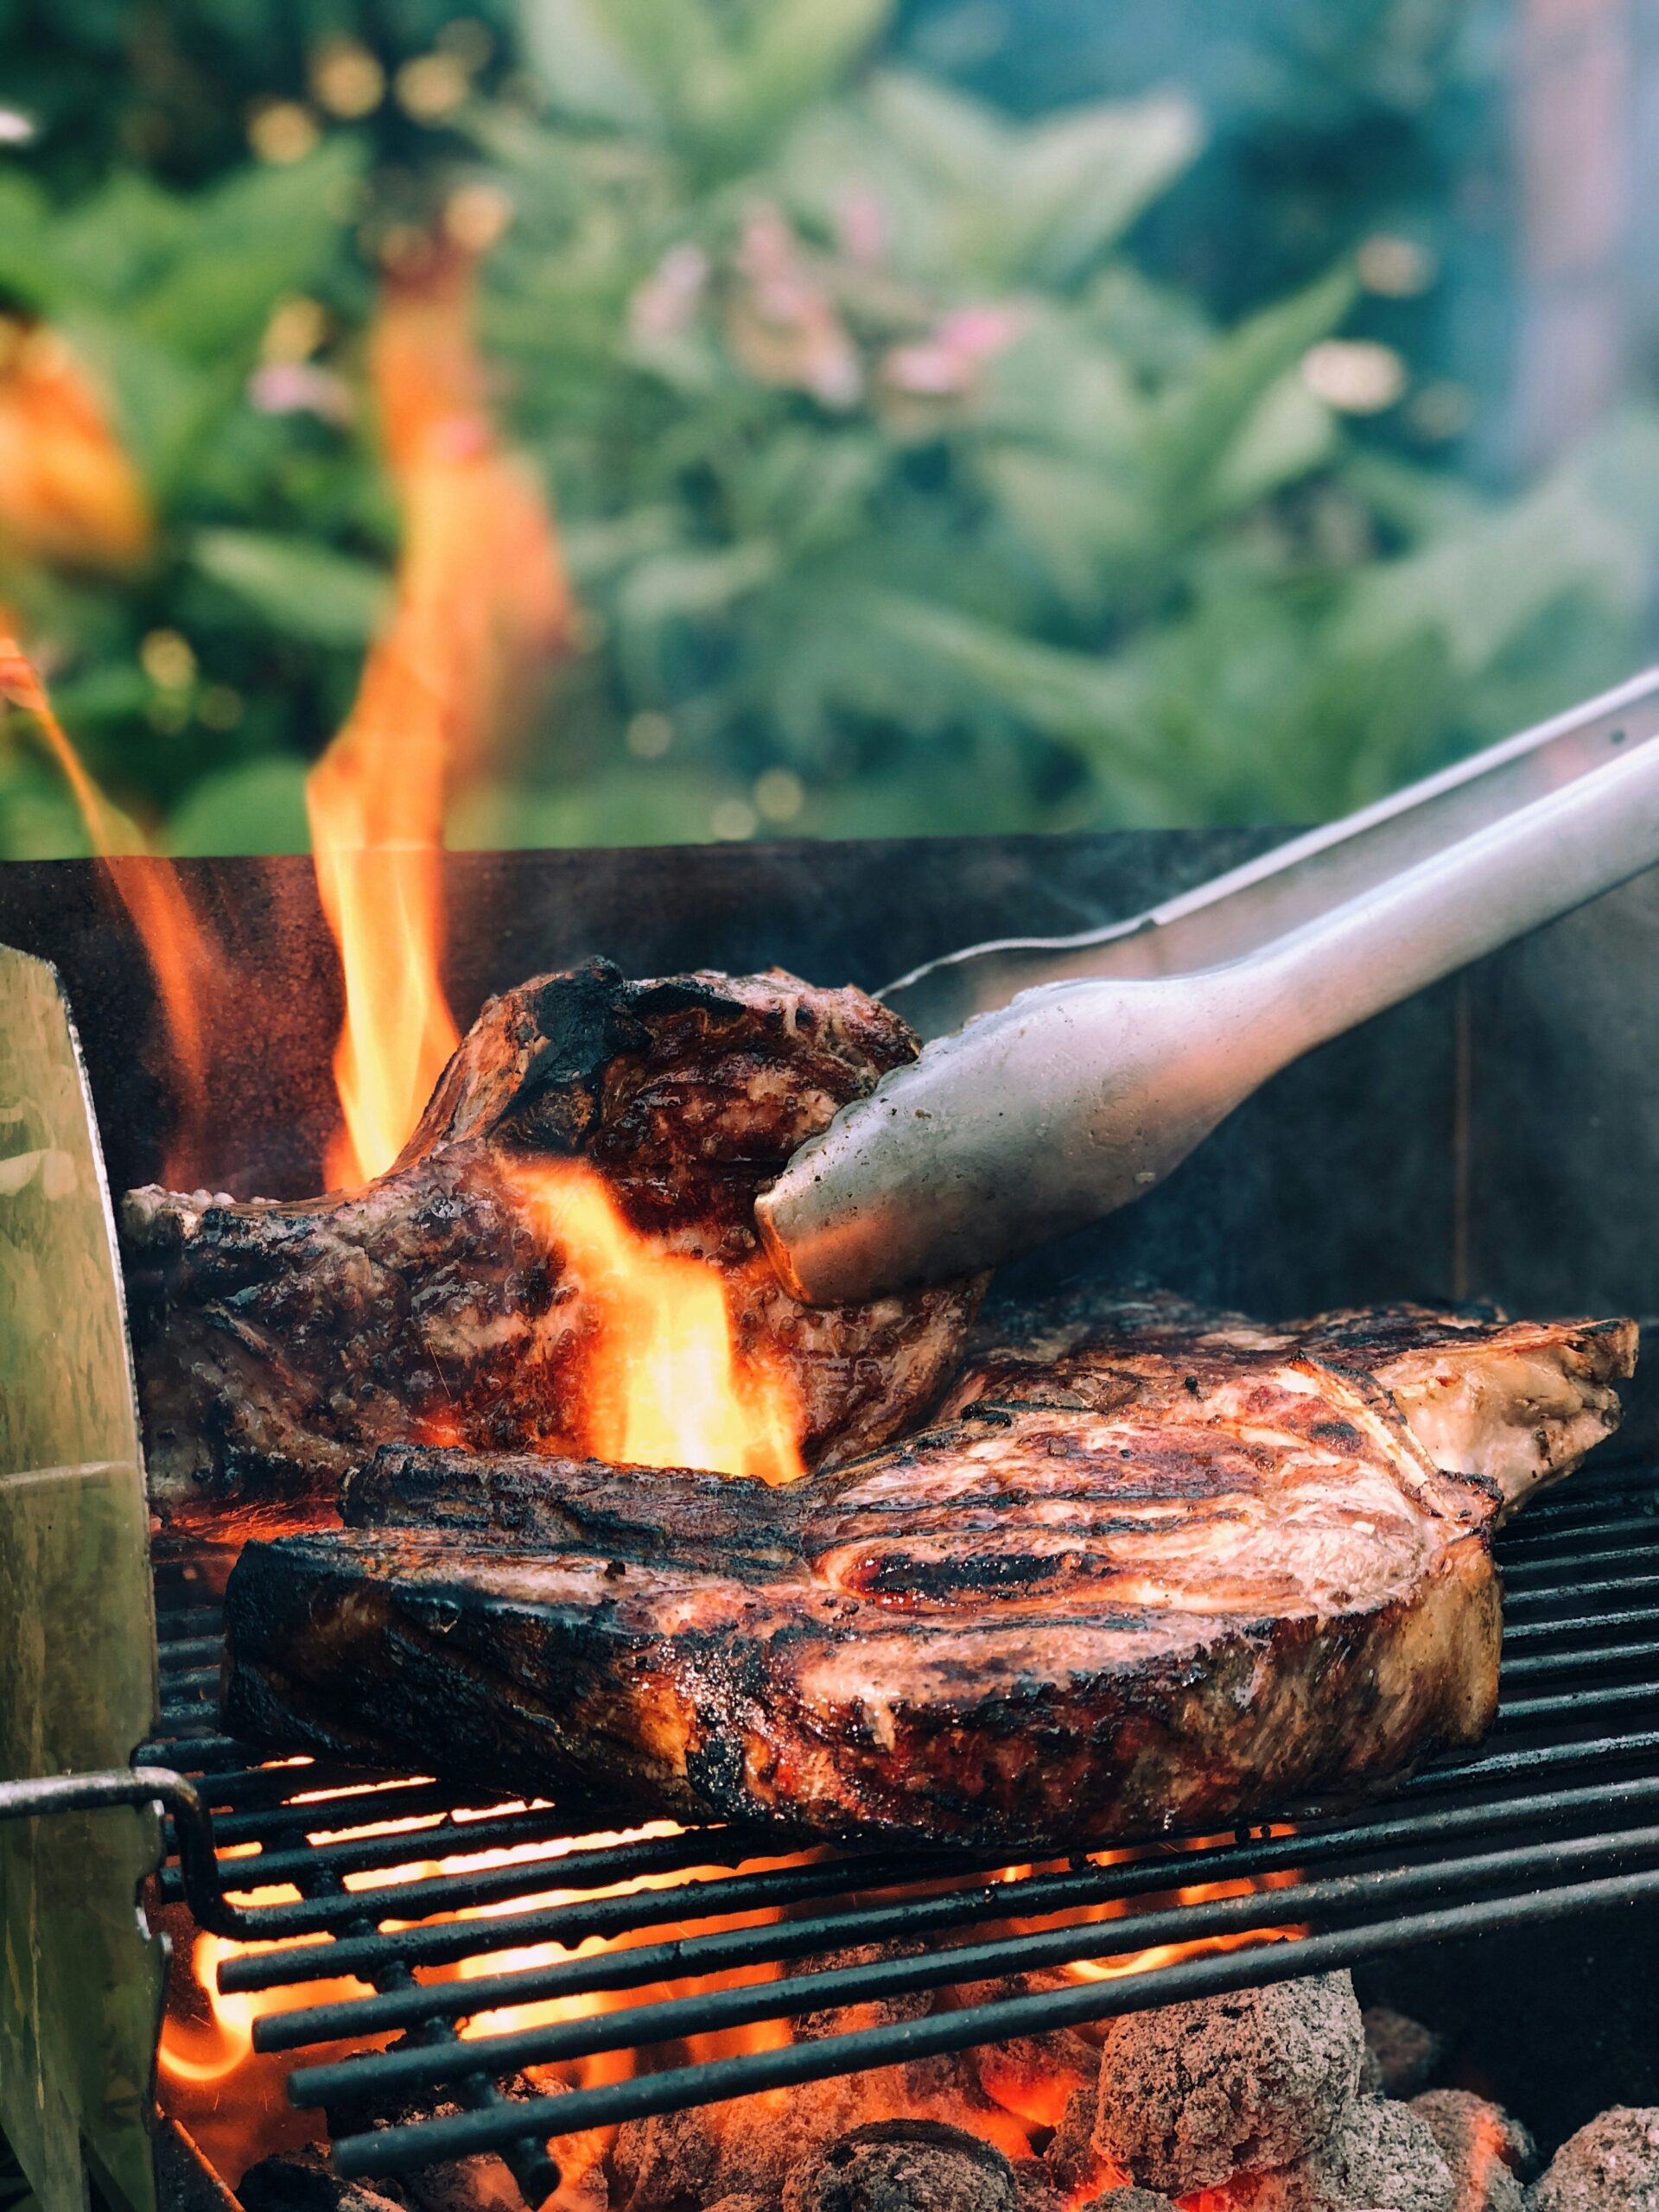
Using Too Much Direct Heat
What is direct heat grilling
Direct heat grilling refers to cooking food directly over a heat source, such as a gas burner or charcoal fire. It is commonly used for quick-cooking items, such as burgers, hot dogs, or thinly-sliced vegetables. Direct heat grilling provides a high, intense heat that sears the surface of the food, creating those sought-after grill marks and a delicious crust.
Downsides of too much direct heat
Using too much direct heat can lead to overcooking and dryness. The intense heat can cause the exterior of the food to char or burn, while the interior remains undercooked. This is especially true for thicker cuts of meat or delicate items that require more gentle cooking. Additionally, excessive direct heat can increase the risk of flare-ups and uneven cooking, affecting the overall quality of your grilled dishes.
How to use direct and indirect heat
To achieve the best results, it’s essential to know when and how to use both direct and indirect heat. For quick-cooking items, such as steaks or burgers, direct heat is ideal. Simply place them directly over the heat source and monitor carefully to avoid overcooking. For larger cuts of meat or delicate items, it’s best to utilize a combination of direct and indirect heat. Start by searing the meat over direct heat to develop a crust, then move it to an area of the grill with no direct heat to finish cooking slowly and evenly.
Not Resting the Meat After Grilling
Why resting meat is important
Resting meat after grilling is a crucial step that allows the juices to redistribute themselves back into the meat. When meat is exposed to high heat, the juices tend to collect in the center. By allowing the meat to rest, these juices have a chance to evenly distribute throughout the cut, resulting in a juicier and more flavorful end product. Resting also helps the meat retain its moisture, preventing it from drying out.
Duration of resting
The duration of resting depends on the size and type of meat. As a general guideline, smaller cuts of meat, such as chicken breasts or steaks, should rest for about 5-10 minutes. Larger roasts or whole chickens may require anywhere from 15-30 minutes of resting time. This allows for the perfect balance between moisture retention and letting the meat cool slightly, making it easier to handle and carve.
What happens if you cut into meat immediately after grilling
Cutting into meat immediately after grilling is a common mistake that can result in a loss of juices and moisture. The heat causes the meat fibers to contract, squeezing out the flavorful juices, which will be lost if you cut into the meat too soon. Additionally, cutting too early can lead to uneven cooking, as the residual heat within the meat continues to cook it further. To ensure a delicious and tender end result, be patient and give your grilled meat the resting time it deserves.
Using Poor Quality Charcoal
Choosing the right type of charcoal
The type of charcoal you choose can greatly impact the flavor and overall grilling experience. Opt for high-quality charcoal made from hardwood, such as lump charcoal or briquettes made from natural wood. These types of charcoal provide a clean burn, free from fillers and chemicals that can taint the taste of your food. Avoid using cheap, low-quality charcoal, as it may produce excessive smoke, uneven heat, and an off-putting flavor.
How charcoal quality affects the grilling
The quality of charcoal directly influences the flavor and aroma of your grilled dishes. Cheap charcoal often contains additives and impurities that can introduce unwanted flavors into your food. High-quality charcoal, on the other hand, burns more evenly, maintain a consistent heat level, and produces a clean smoke that enhances the natural flavors of your food. By investing in good quality charcoal, you’ll elevate your grilling game and ensure the best possible results.
Charcoal versus Gas Grills
The debate between charcoal and gas grills is a long-standing one, and ultimately it comes down to personal preference. Charcoal grills offer a unique flavor profile, providing a smoky and distinct taste that gas grills can’t replicate. They also allow for more precise temperature control, making them ideal for low and slow cooking. On the other hand, gas grills offer convenience and ease of use. They heat up quickly and are often equipped with features such as temperature control knobs and rotisserie attachments. Ultimately, the choice between charcoal and gas boils down to your individual grilling style and culinary preferences.
Ignoring Food Temperature
Necessity of a food thermometer
Using a food thermometer is essential to ensure the safety and doneness of your grilled meats. It allows you to accurately measure the internal temperature of the food, ensuring that it has reached a safe level to consume and avoiding the risk of foodborne illness. Different meats have different recommended internal temperatures, so having a reliable food thermometer is crucial to achieve perfectly cooked and safe-to-eat dishes.
Correct internal temperatures for different meats
To ensure your grilled meats are cooked to their desired doneness, it’s important to know the correct internal temperatures. For chicken, the internal temperature should reach 165°F (74°C), while ground meat, such as burgers or sausages, should be cooked to an internal temperature of 160°F (71°C). Medium-rare steaks should have an internal temperature of 145°F (63°C), while medium to well-done steaks range from 160-170°F (71-77°C). Fish should reach an internal temperature of 145°F (63°C) and pork should be cooked to 145°F (63°C) with a three-minute rest.
Risks of undercooked or overcooked food
Cooking food to the correct internal temperature is important for both safety and taste. Undercooked food poses a risk of bacterial contamination, which can cause foodborne illnesses such as salmonella or E. coli. Overcooked food, on the other hand, can result in dry, tough, and flavorless dishes. By using a food thermometer and ensuring your food reaches the recommended internal temperature, you can confidently serve perfectly cooked, safe, and delicious grilled meals to your family and friends.
In conclusion, grilling is a beloved cooking method that allows you to enjoy flavorful, charred, and delicious meals. By avoiding common mistakes, such as not preheating the grill, ignoring safety precautions, using dirty grill grates, failing to oil the grates, overcrowding the grill, constantly flipping food, using too much direct heat, not resting the meat after grilling, using poor quality charcoal, and ignoring food temperature, you can elevate your grilling game and achieve outstanding results. So, fire up that grill, follow these tips, and get ready to indulge in the ultimate outdoor cooking experience!